Why Disperse Digital Prints Lose Sharpness During Heat Fixation: Ink Migration, Fabric and Pretreatment Causes
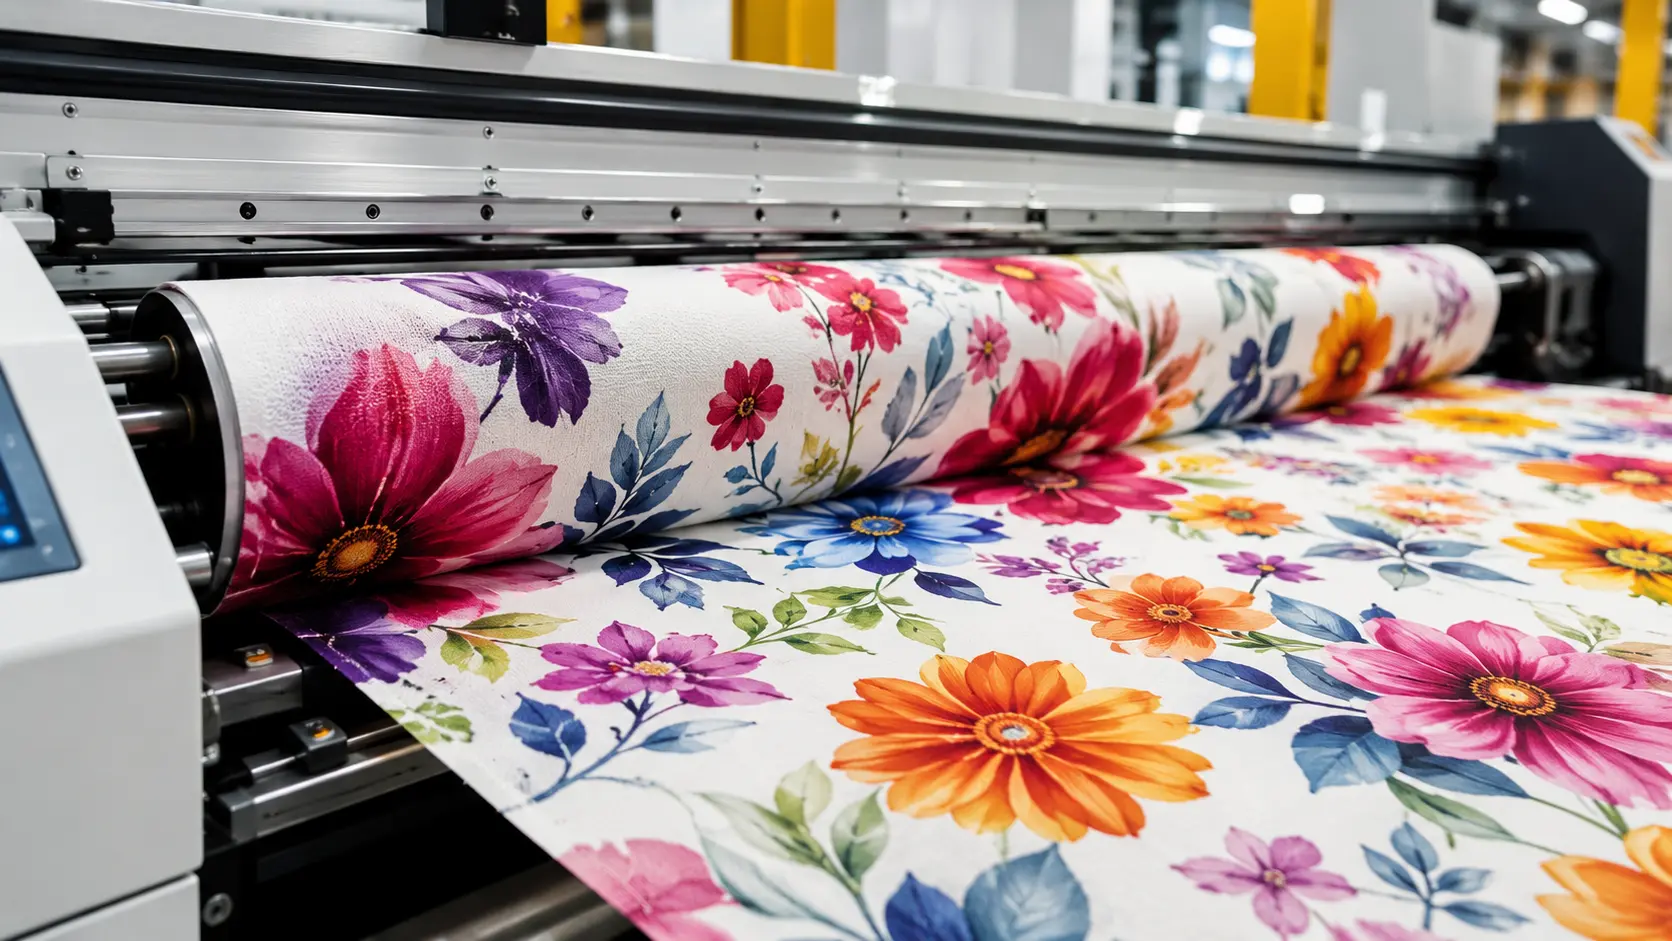
Direct disperse prints can lose definition during heat fixation because ink mobility, pretreatment behavior and...
When a direct disperse print loses definition during heat fixation, separate lateral color movement from polyester shrinkage before changing ink or pretreatment. Compare the same registered fine lines before heating, after heating and after the approved after-treatment. Record local fabric scale change, residual moisture, pretreatment add-on and the actual thermal history; a wider or softer edge alone does not identify one chemical cause.
Why Do Disperse Digital Prints Lose Sharpness During Heat Fixation?
This guide concerns disperse ink printed directly on polyester fabric. It does not use a transfer-paper image as the pre-fixation reference. Follow the actual ink supplier’s heat-fixation and after-treatment route; not every purpose-designed direct disperse system requires reduction clearing. For a conventional route where clearing is specified, retain all three checkpoints. The likely causes of heat-stage definition loss fall into three groups:
Ink / dye migration: the printed deposit remains sufficiently mobile that heat allows additional spreading or redistribution.
Pretreatment-film behavior: the migration-control layer softens, redistributes or holds / releases disperse dye differently during heating.
Fabric movement: polyester shrinks, relaxes or changes geometry under heat and tension, altering the apparent line width and edge shape.
The most useful diagnostic sequence is:
Measure Before Fixation → Heat Fix → Measure Again → Complete the Approved Production After-Treatment, If Specified → Measure the Finished Fabric. If the route ends after heat fixation, record that endpoint and run end-use laundering or fastness tests separately; do not add reduction clearing solely to follow this diagnostic map.
This identifies the stage where sharpness first changes.
If the print is already blurry before fixation, the primary cause is more likely:
Praperlakuan
Penyebaran tinta
Fabric construction
Residual moisture
rather than the heat-fixation stage itself.
First Question: Was the Print Already Blurred Before Fixation?
This question prevents many incorrect process changes.
Compare the same diagnostic line or pattern at three checkpoints:
Checkpoint 1 — Immediately Before Heat Fixation
Measure printed line width and edge definition after any normal post-print stabilization / drying.
Checkpoint 2 — Immediately After Heat Fixation
Measure the same locations before washing.
Checkpoint 3 — After the Approved Production Route
Measure the finished commercial fabric after the route specified for this ink and fabric. Where reduction clearing or washing is specified, keep it identical between candidates. For a qualified route without production washing, this checkpoint is the heat-fixed endpoint; laundering test specimens are a separate evaluation.
Interpretation:
Before Fixation
After Fixation
After the Approved Route
Likely Direction
Blurred
Blurred
Blurred
Printing / pretreatment problem already existed
Sharp
Less sharp
Less sharp
Heat-fixation migration / fabric movement
Sharp
Sharp
Cleaner / sharper
Surface dye removed; fixation may be acceptable
Sharp
Dark but softer
Large color loss
Surface dye / incomplete diffusion may be significant
Three Main Sharpness-Loss Pathways During Heat Fixation
A practical root-cause model is:
Printed Ink Deposit + Pretreatment Surface + Polyester Geometry + Heat / Time → Final Image Geometry
These mechanisms interact.
Misalnya:
High Ink Load + High Residual Moisture + Soft Pretreatment Film + High Thermal Severity
can create more image movement than any factor alone.
Therefore, do not solve a thermal sharpness problem by changing only one variable before the stage of first divergence is known.
1. Ink / Dye Migration During Heating
Disperse ink contains dye particles / molecules, water and organic ink vehicles before fixation.
As heating begins:
Residual liquid evaporates.
Ink components change viscosity and mobility.
Disperse dye gains thermal mobility.
Dye begins diffusing toward and into polyester.
If the printed deposit is not sufficiently stabilized before fixation, some movement can continue along:
Fiber surfaces
Yarn boundaries
Inter-yarn capillaries
This can widen edges or soften fine detail.
Do not confuse this with molecular dye diffusion into PET, which is required for fixation.
The problem is uncontrolled lateral redistribution, not dye diffusion itself.
Residual Mobile Liquid Before Fixation
Heat fixation is easier to control when the printed image enters the high-temperature zone in a reproducible moisture state.
If the image contains too much mobile liquid:
The liquid phase can move before evaporation is complete.
Capillary pathways can continue transporting dye.
High-ink-load areas can remain mobile longer than fine lines.
Possible causes include:
Insufficient post-print drying
Excessive ink load
High pretreatment residual moisture
Local wet spots from nonuniform pretreatment
If only high-coverage areas soften during fixation, test the mobile-liquid hypothesis before changing the pretreatment polymer.
High Surface Dye Concentration
Pretreatment is often designed to keep disperse ink near the printable surface before fixation.
This improves image sharpness.
But a very high surface concentration means the thermofixation stage must move more dye from the surface environment into polyester.
If the dye is trapped in a strong polymer film or the fixation window is insufficient, more color can remain as surface / floating dye.
Possible symptoms include:
Very dark appearance before washing
Significant K/S loss after reduction clearing
Lower rubbing fastness
High surface color before clearing should therefore not be treated as proof of successful fixation.
Excessive Thermal Severity
High temperature and long time increase molecular mobility.
Within the useful fixation window, this helps disperse dye enter PET.
Beyond the useful window, additional thermal severity can increase the risk of:
Unwanted dye redistribution
Shade change for thermally sensitive dye combinations
Pretreatment-film softening / change
Fabric shrinkage or relaxation
Higher energy use
The correct target is:
Enough Thermal Energy for Fixation, but Not Maximum Thermal Exposure.
Disperse Dye Class and Thermal Mobility
Disperse dyes differ in:
Molecular size
Energy class
Diffusion rate
Sublimation fastness
Thermal stability
A heat-fixation condition that preserves sharpness for one color may not behave identically with:
A different disperse red
Blue
Yellow
Black mixture
Multi-color patterns can therefore show color-specific edge changes.
Validate the full CMYK / production ink set rather than one laboratory color only.
2. Pretreatment Film and Polymer Causes
The pretreatment film controls ink spreading before fixation.
During heating, the same film is exposed to:
Higher temperature
Residual moisture loss
Dye diffusion
Possible polymer softening or structural change
Therefore:
Pretreatment Performance Must Survive the Fixation Stage, Not Just the Printing Stage.
A pretreatment that creates excellent initial sharpness but unstable thermal behavior can still produce poor final image definition.
Pretreatment Film Softening or Structural Change
Different polymers respond differently to heat and moisture loss.
During fixation, a polymer film may:
Remain relatively rigid
Soften
Lose water and contract
Change adhesion to the fiber
For compound pretreatments containing film-forming components, thermal response can be especially important.
If sharpness is stable before heating but deteriorates only at higher fixation severity, compare the pretreatment film under lower and reference thermal conditions.
Do not assume the dye alone is responsible.
When Pretreatment Polymer Add-On Is Too Low
Low polymer add-on generally creates the sharpness defect before fixation.
Typical symptoms include:
Wider lines
Fuzzy edges
More yarn-direction spreading
Heat fixation may make the defect more visually obvious, but it cannot recreate lost geometric definition.
If pre-fixation sharpness already fails, increase focus on:
Pretreatment add-on
Reologi
Wet pick-up
Fabric surface condition
rather than fixation first.
When Pretreatment Polymer Add-On Is Too High
Excess polymer can create:
Very high surface hold
Heavy film
High surface dye concentration
Greater after-treatment load
During fixation, the dye must transfer from that polymer-rich surface environment into polyester.
Published disperse-inkjet literature discusses the competing effects of surface image control and dye transfer into polyester. Research on purpose-designed direct disperse inks also shows why ink chemistry, polymer and the fixation route must be treated as one system. These findings justify controlled add-on trials; they do not establish that every polymer film blocks dye diffusion or that a conventional ink can simply omit fabric pretreatment.
Therefore, a darker and sharper pre-fixation image is not automatically the optimum final process.
Surface Localization vs. Deep Pretreatment Penetration
Total polymer add-on does not describe where the polymer is located.
Two pretreatments can have the same dry add-on but different:
Surface concentration
Yarn penetration
Face-to-back distribution
This can change both:
Pre-fixation sharpness
Thermal dye-release behavior
A highly surface-localized film may hold edges strongly but require a more carefully balanced fixation window.
A deeply penetrated polymer layer may provide less surface sharpness but create a different dye-diffusion pathway.
Salts and Other Pretreatment Auxiliaries
Some published polyester pretreatment systems use salts or ionic auxiliaries to modify:
Polymer rheology
Ink-fabric interaction
Droplet spreading
These auxiliaries remain in or on the fabric during heat fixation.
Their influence depends on:
Ion type
Polymer chemistry
Konsentrasi
Wash-off route
Do not generalize one published salt system to every disperse pretreatment.
3. Fabric and Mechanical Causes
A loss of apparent sharpness after fixation can also result from the fabric changing shape rather than the dye moving laterally.
Polyester fabrics can:
Shrink
Relax
Change width
Change loop / yarn geometry
during high-temperature treatment.
If line width changes together with fabric dimensions, separate geometric fabric change from true ink migration.
Thermal Shrinkage and Fabric Relaxation
Suppose a printed line is measured before fixation and the fabric later shrinks in one direction.
The line width, spacing and edge geometry can all appear different after heating even if the dye boundary did not migrate significantly.
Therefore, record:
Fabric width before fixation
Fabric width after fixation
Length change
GSM where relevant
when analyzing line-width change.
Normalize image measurements if fabric dimensional change is significant.
Fabric Tension During Fixation
Continuous thermofixation equipment can hold fabric under tension while it is heated.
Tension can change:
Width
Ketebalan
Yarn spacing
Knit-loop geometry
If tension differs from the laboratory fixation method, the production print can show different edge appearance even at similar thermal severity.
Record tension / overfeed / width-setting conditions where the equipment allows.
Warp / Weft and Wale / Course Direction Effects
Polyester inkjet sharpness is direction-dependent because liquid follows textile structure.
Report the direction used for the sharpness comparison: warp/weft for woven fabric or wale/course for knits. Apply the appropriate axes to the actual construction rather than assuming one directional response for all polyester fabrics. The xanthan-gum pretreatment study supports direction-specific sharpness assessment; it does not establish a universal thermal setting or demonstrate how an FSX grade behaves during heat fixation.
Therefore, measure:
Horizontal / vertical test lines
Warp / weft on woven fabrics
Wale / course on knits
before and after fixation.
A thermal change in one direction only can point toward fabric geometry or directional diffusion rather than a universal pretreatment problem.
Woven Polyester
Woven construction creates specific capillary pathways at yarn intersections.
During fixation, dimensional stability is often better than on highly elastic knits, but:
Weave type
Thread density
Yarn type
still affect image sharpness.
Keep fabric construction constant during fixation studies.
Knitted Polyester
Knitted fabrics can change more strongly under thermal and mechanical conditions.
Possible effects include:
Loop relaxation
Width change
Stretch recovery
Local geometry change
A printed edge can therefore look softer after fixation partly because the substrate geometry changed.
Record wale / course line widths and dimensional change separately.
Microfiber / Fine-Filament Polyester
Microfiber polyester has high surface area and fine capillary structure.
It can show different:
Pretreatment retention
Penyebaran tinta
Dye diffusion
Heat response
from conventional filament polyester.
Do not use one thermal-sharpness window for all PET constructions.
Residual Moisture Before Heat Fixation
Incoming moisture changes the first part of the heating cycle.
If moisture is high:
More heat is initially consumed by evaporation.
Fabric temperature can rise more slowly.
The printed deposit can remain mobile for longer.
If moisture varies across width, thermal sharpness can also vary across width.
Control the moisture state before comparing temperature/time conditions.
Post-Print Drying Before Fixation
Where the process includes post-print drying or stabilization, its function is to immobilize the wet printed image sufficiently for handling and later fixation.
If it is insufficient:
Wet ink can continue to spread.
Contact transfer can occur.
Heat-fixation blur can actually begin before the high-temperature zone.
If it is too aggressive:
The printed surface can become highly concentrated with dye and auxiliaries.
The subsequent fixation response can change.
Record this stage separately from thermofixation.
Temperature and Time Interaction
Temperature increases disperse-dye mobility and PET segmental mobility.
Time controls how long these processes continue.
Higher temperature can often allow shorter time, but:
Temperature and Time Are Not Perfect Substitutes.
Different combinations can create different:
Dye diffusion
Thermal migration
Pretreatment-film response
Fabric shrinkage
Build a controlled temperature × time matrix instead of changing only temperature.
Machine Setpoint vs. Actual Fabric Temperature
The air or machine setpoint is not automatically the fabric temperature.
Actual fabric heating depends on:
Fabric GSM
Incoming moisture
Airflow
Line speed
Equipment loading
Two fabrics can pass through the same machine setting but reach different thermal histories.
For precise troubleshooting, use direct or validated indirect fabric-temperature measurement where practical.
Airflow and Widthwise Thermal Uniformity
If image sharpness changes only in one width zone after fixation, check thermal uniformity.
Possible causes include:
Uneven airflow
Blocked nozzles
Top / bottom imbalance
Uneven fabric tension
Bandingkan:
Left → Center → Right
for:
Pre-fixation line width
Post-fixation line width
Final K/S after the approved route
A width-specific change is unlikely to be caused by one globally uniform ink formulation alone.
How to Measure Sharpness Loss Quantitatively
Use a fixed diagnostic image with known digital geometry.
Useful metrics include:
Printed line width
Line-width change percentage
Edge roughness
Long / short axis of printed droplets
Droplet spread area
Use one calibrated image method, illumination, edge threshold and sample orientation at every checkpoint. Measure line width perpendicular to the line, at registered positions. For nonuniform fabric, use nearby gauge marks or image registration in each measured region rather than applying one whole-roll shrinkage value. First report the raw measurement:
A positive raw value indicates measured line broadening, but this includes fabric stretch or shrinkage. Edge roughness and white-ground staining are separate observations and may change even when average line width remains similar.
For a locally uniform scale change, define s = post-fixation gauge distance ÷ pre-fixation gauge distance in the direction of the width measurement. Then the dimension-corrected post-fixation width is Wafter ÷ s, and corrected line-width change (%) = [Wafter ÷ (s × Wbefore) − 1] × 100. Use separate direction-specific factors for warp/weft or wale/course; one factor is inadequate where local deformation is uneven. As a hypothetical calculation, a 200 µm line becomes 196 µm while its local gauge contracts from 20 to 19 mm. Raw change is −2%; s = 0.95 and corrected change is about +3.2%. This suggests broadening beyond uniform contraction, but does not by itself prove dye migration: changing contrast, residue or measurement uncertainty can affect the detected edge.
Build a Before / After Fixation Sharpness Map
Measurement
Before Fixation
After Fixation
After the Approved Route
Horizontal line width
Measure
Measure
Measure
Vertical line width
Measure
Measure
Measure
Edge roughness
Measure / score
Measure / score
Measure / score
K/S
Optional reference
Measure
Final value
Fabric width / length
Measure
Measure
Measure if relevant
This map identifies whether image geometry changes during thermal fixation or mainly during after-treatment.
Why Sharpness Should Also Be Checked After Reduction Clearing
Where the approved direct-disperse route specifies reduction clearing or another wash-off process, it targets surface or unfixed color and removable residues. Removal depends on the dye, pretreatment chemistry and actual method; it is not guaranteed to strip every polymer film. For a qualified no-wash route, do not insert this stage. Potential targets include:
Unfixed / surface disperse dye
Removable pretreatment residues, where compatible with the specified after-treatment
Other surface residues
After clearing, edges can sometimes appear cleaner because loose surface color has been removed.
Conversely, a print that looked dark before washing may lose color when surface material is removed. Investigate fixation together with the dye system, deposited dye, pretreatment residue and the actual after-treatment; color loss alone does not quantify the amount of dye within PET or identify a unique fixation failure.
Final sharpness should therefore be judged on the finished fabric.
Sharpness vs. Color Yield
Sharpness and K/S are separate performance dimensions.
A pretreatment can produce:
Very narrow lines
Strong surface color
before fixation, yet still lose significant K/S after clearing if dye transfer into PET is insufficient.
Another system can produce slightly more penetration but better fixation and higher final color.
Evaluasi:
Line width
Final K/S after the approved route
Ketahanan
separately before selecting the final condition.
Sharpness vs. Dye Penetration
Two types of “penetration” should be separated:
Liquid Ink Penetration
Occurs mainly before fixation through yarn and fabric capillaries.
Molecular Dye Diffusion into PET
Occurs during heat fixation and is required for proper disperse-dye fixation.
A strong pretreatment should reduce uncontrolled liquid penetration while still allowing adequate molecular dye diffusion during fixation.
Confusing these mechanisms can lead to excessive polymer dosage or excessive heat.
Sharpness vs. Fixation Quality
A sharp print is not necessarily well fixed.
A well-fixed print is not necessarily geometrically sharp.
Final approval should include:
Ketajaman
K/S
Rubbing / washing fastness
White-ground cleanliness where relevant
This is especially important for high-surface-hold pretreatments.
Same Ink, Different Fabric: Why Fixation Sharpness Can Change
The same disperse ink can behave differently on:
Woven polyester
Warp knit
Stretch knit
Microfiber
because the fabric changes:
Capillary pathways
Heat transfer
Tension response
Dimensional stability
Therefore, a heat-fixation sharpness specification should be fabric-specific.
Same Pretreatment, Different Heat-Fixation Result
Even with identical pretreatment concentration, differences in:
Wet pick-up
Polymer surface distribution
Pengeringan
Residual moisture
can change the surface entering fixation.
This is why one pretreatment batch can perform differently on two production lots without the chemical itself being inconsistent.
Record the full process, not product dosage alone.
What Pretreatment-Free Disperse Ink Research Tells Us
Research has developed purpose-designed direct disperse inks with temperature-dependent structure to suppress spreading on polyester without conventional pretreatment. The thermosensitive disperse-ink study reports one such formulation. This is evidence from a particular ink system, not a recommendation to add research ingredients to a commercial ink or a guarantee that an existing factory can remove pretreatment.
The purpose is to suppress ink bleeding without conventional fabric pretreatment.
This particular ink study illustrates one approach to controlling local ink mobility:
Controlling Local Ink Mobility Before Fixation Preserves Image Geometry.
But these are purpose-designed ink systems.
They do not mean that conventional disperse ink should be modified casually or that every production fabric can eliminate pretreatment.
Recommended Root-Cause Diagnostic Sequence
Measure line width / sharpness before fixation.
Record fabric dimensions before fixation.
Freeze ink load, pretreatment and post-print drying.
Run the current thermofixation condition.
Measure sharpness and dimensions again.
Complete the approved production after-treatment, if specified, using one fixed method; otherwise retain the heat-fixed endpoint.
Measure final K/S, sharpness and fastness.
If sharpness changes only during heating, build a temperature × time matrix.
If high surface dye remains, test pretreatment add-on / film effects.
If line geometry changes with fabric dimensions, investigate tension / shrinkage.
This sequence locates the first measured change and prioritizes ink, pretreatment and fabric hypotheses that can look similar in the finished print. It does not identify a unique mechanism without the corresponding controlled comparisons.
Build a Temperature × Time Sharpness Matrix
Start from the validated ink / equipment baseline rather than from a generic temperature.
Condition
Suhu
Time
Pre-Fix Sharpness
Post-Fix Sharpness
Final K/S after the approved route
A
Lower controlled
Longer
Reference
Measure
Measure
B
Reference
Reference
Reference
Kontrol
Kontrol
H
Higher controlled
Shorter
Reference
Measure
Measure
D
Reference
Shorter
Reference
Measure
Measure
E
Higher controlled
Reference
Reference
Thermal stress check
Measure
The exact temperature and time range should come from the disperse ink supplier, dye class, polyester construction and equipment.
Build a Pretreatment × Heat-Fixation Matrix
Pretreatment Condition
Lower Thermal Severity
Reference Thermal Severity
Higher Thermal Severity
Lower polymer add-on
Uji Coba
Uji Coba
Diagnostic
Reference add-on
Uji Coba
Kontrol
Uji Coba
Higher polymer add-on
Diagnostic
Uji Coba
Uji Coba
For each condition, compare:
Pre-fix line width
Post-fix line width
Final K/S after the approved route
Ketahanan
Hand
This matrix tests whether the thermal response depends on the measured pretreatment add-on. A result may be consistent with a film-related effect, but add-on can also change deposition, moisture and heat transfer. Record those variables and repeat the relevant comparisons before attributing a mechanism or selecting a production window.
Build a Fabric-Tension / Thermal Matrix
If the problem appears mainly on knits or stretch fabrics, hold chemistry constant and compare:
Reference tension / width setting
Lower controlled tension
Alternative overfeed / relaxation setting where equipment permits
at one fixed thermal condition.
Measure:
Fabric width / length
Horizontal line width
Vertical line width
K/S
This compares the combined response to the tested tension or relaxation settings. Track local gauge dimensions, registered line geometry, residual moisture and actual fabric thermal history together. Dimension correction can estimate broadening beyond a locally uniform scale change, but uneven deformation, contrast or edge-threshold changes can remain. Treat the result as evidence for follow-up; it is not a chemical identification of dye migration or a complete separation of fabric and ink effects.
Recommended Laboratory Workflow
Use one representative polyester fabric lot.
Freeze the disperse ink, printhead, print mode and ink load.
Apply one controlled pretreatment condition.
Control pretreatment drying and residual moisture.
Print a diagnostic image containing fine lines, small text and high-coverage blocks.
Stabilize / dry the printed image using one defined method if required.
Measure pre-fixation line width and fabric dimensions.
Run controlled heat-fixation conditions.
Measure post-fixation line width and dimensions.
Use the same approved production after-treatment where it is specified; keep laundering validation as a separate test.
Measure final line width, K/S and fastness.
Select a stable thermal window rather than one maximum-temperature condition.
After-treatment demand where the production route requires it
Thermal energy
Production downtime
Quality rejects
A useful model is:
Cost per accepted m² = allocated monetary costs of pretreatment, printing, required post-print drying, heat fixation, specified production after-treatment and non-overlapping rework or disposal allocations ÷ accepted finished-fabric area (m²). Use one currency and the process stages actually used, with a stated allocation for quality-control and durability testing. Price consumed materials, energy, labor and machine time from documented rates. Do not count rejected-material value again if already included in consumption; report unpriced speed or downtime separately. Compare linear metres only at a comparable finished width and fabric specification.
Higher fixation temperature is not free.
Higher polymer add-on is not free.
The economically correct process is the lowest stable combination that delivers:
Ketajaman
Finished color after the approved route
Ketahanan
Fabric dimensional quality
What Information Should You Send to a Supplier?
For useful heat-fixation sharpness troubleshooting, provide:
Polyester fabric construction / GSM / width
Disperse ink supplier / grade
Current pretreatment product / TDS
Pretreatment concentration / dry add-on
Pretreatment application route
Pretreatment drying conditions
Residual moisture if available
Print mode / approximate ink load
Post-print drying if used
Pre-fixation line width / photo
Heat-fixation temperature / time / line speed
Fabric tension / width setting where relevant
Post-fixation line width / photo
Approved production after-treatment route, or confirmation that no wash-off stage is used
Final K/S after the approved route / sharpness / fastness
Main issue: edge broadening, thermal blur, color loss, floating dye or width variation
FSX Chemical can use this information through Sampel & Pencocokan Grade to investigate ink migration, fabric movement and pretreatment hypotheses through staged measurements and controlled comparisons.
How Should a Mill Diagnose Sharpness Loss During Heat Fixation?
A practical workflow is:
Measure Before Fixation → Record Local Fabric Dimensions → Heat Fix → Measure Again → Complete Any Specified Production After-Treatment → Measure Final Sharpness / Color / Fastness → Separate Color Movement from Pretreatment and Fabric Effects. If no production wash is part of the qualified route, assess finished geometry after heat fixation and evaluate laundering durability separately.
The key principles are:
If the print is already blurred before fixation, fix the printing / pretreatment stage first.
If sharpness changes only during heating, investigate thermal severity, residual liquid, pretreatment-film behavior and fabric dimensional change.
Do not treat required molecular dye diffusion into PET as the same phenomenon as unwanted lateral image migration.
High pretreatment polymer add-on can improve pre-fixation sharpness but can also increase surface dye and change the fixation requirement.
Measure line width and fabric dimensions before and after heat so shrinkage is not misdiagnosed as dye migration.
The best process preserves image geometry while still achieving adequate dye diffusion, finished color after the approved route and fastness at the lowest practical Total Cost in Use.
Pertanyaan yang Sering Diajukan
1. Why does a disperse digital print look sharp before heat fixation but blurry afterward?
Possible causes include residual mobile ink, excessive thermal severity, pretreatment-film softening or redistribution, thermal dye migration, and polyester shrinkage or relaxation.
2. Can thermofixation fix a print that was already blurred before heating?
No. Heat fixation can improve dye diffusion and fixation, but it cannot restore lost geometric edge definition.
3. Does higher fixation temperature always reduce sharpness?
No. The correct temperature is required for disperse-dye diffusion. Sharpness loss becomes a concern when thermal severity, residual liquid, pretreatment or fabric behavior creates unwanted lateral movement or dimensional change.
4. How can I tell whether line broadening comes from dye migration or fabric shrinkage?
Measure registered line widths and local, direction-specific gauge dimensions before and after fixation using the same calibrated image and edge method. Correct for a locally uniform scale change where valid, report raw and corrected values with uncertainty, and investigate tension or shrinkage. Residual broadening supports further migration checks; it does not by itself prove dye movement.
5. Can too much pretreatment thickener cause sharpness loss during fixation?
It can contribute in some systems by creating a heavy surface film, retaining more dye outside PET or changing its thermal release. Verify polymer add-on and finished color after the approved route.
6. Why is residual moisture important before heat fixation?
High moisture slows initial fabric heating and can keep the printed deposit mobile for longer, increasing the possibility of redistribution before fixation stabilizes the image.
7. Why does only one disperse ink color soften during fixation?
Different disperse dyes can have different molecular size, diffusion and thermal / sublimation behavior. Evaluate the individual ink or dye class.
8. Should sharpness be measured before or after reduction clearing?
Where reduction clearing is part of the approved production route, measure both before and after it: the comparison helps locate when an edge changes. The finished commercial fabric is the endpoint of the actual qualified route, not necessarily a cleared fabric. Keep end-use laundering tests separate from production wash-off.
9. Why can knitted polyester lose more apparent sharpness after heating?
Knits can relax or change loop geometry, width and tension under heat, so apparent image dimensions can change even without severe lateral dye migration.
10. Can pretreatment-free disperse inks avoid heat-fixation blur?
Purpose-designed thermosensitive or thixotropic inks can suppress spreading before fixation, but they still require a validated fixation process. They are not equivalent to conventional disperse inks without pretreatment.
11. What is the best test for heat-fixation sharpness loss?
Use a fixed fine-line pattern and measure line width, edge roughness and local fabric dimensions before fixation, after fixation and after any specified production after-treatment. Apply a consistent image method, dimension correction and uncertainty check; test end-use fastness separately.
12. What should I send FSX Chemical for heat-fixation sharpness troubleshooting?
Send the polyester construction, disperse ink/TDS, pretreatment/TDS and add-on, drying/moisture conditions, registered pre-fixation image, fixation temperature/time or line speed, post-fixation image and the approved after-treatment and fastness results. State explicitly if the production route has no wash-off stage.
Find the Stage Where Sharpness Is Actually Lost
If direct disperse printing on polyester is sharp after printing but becomes wider, softer or less defined after heat fixation, FSX Chemical can help structure a controlled before/after investigation of ink mobility, pretreatment-film behavior and fabric thermal movement. Staged observations guide the next test; they do not establish one cause on their own.
Mulailah dengan Sampel & Pencocokan Grade and provide your current polyester, disperse ink, pretreatment and heat-fixation conditions.
Identify whether image geometry changes before heat, during heat or during any specified production after-treatment. Then control local color mobility, polymer add-on, fabric dimensions and thermal history at the stage of first change. Final approval follows the qualified ink–fabric process and the agreed durability requirements.
Sodium alginat merupakan pengental standar untuk pencetakan dengan pewarna reaktif pada kain katun, namun tidak cocok untuk pencetakan dengan pewarna dispersi pada poliester. Panduan ini menjelaskan alasannya, perbedaan kimia pewarna apa saja yang terlibat, serta jenis pengental apa saja yang sesuai untuk pencetakan pada poliester dan campuran poliester.
Compare CMC and FSX CMS print sharpness with grade-specific preparation, complete-paste rheology and measured add-on. Assess dye wash-off separately from pigment-film fastness; CMC DS is not a universal descriptor for the CMS series.
Choosing a textile printing thickener starts with more than viscosity. Learn how fiber type, fabric construction, absorbency, dye chemistry and printing technology determine the most suitable thickener route.
CMS can be evaluated as a thickener or compound-thickener component in selected polyester disperse printing systems, but performance depends on complete-paste stability, screen rheology, dye release during thermal fixation and finished print quality—not stock-paste viscosity alone.
CMS and tamarind-derived thickeners can both work in polyester disperse printing, but they differ in hydration, rheology, screen running, dye release, wash-off and batch behavior. The correct choice should be made from controlled printing trials rather than viscosity or price alone.
Cotton, viscose and lyocell all support reactive inkjet chemistry, but their swelling, water uptake, fabric structure and penetration behavior can require different pretreatment add-on, drying, moisture and fixation windows.
Padding, coating and spray can all be used to apply textile pretreatment before digital printing, but they do not create the same chemical distribution inside the fabric. Padding thoroughly wets the textile and uses a squeeze nip to control retained liquor. Coating meters a controlled layer onto the surface and is highly sensitive to coating gap, fabric tension, thickness and rheology. Spray meters droplets onto one or both fabric faces and can reduce the amount of water carried into drying, but nozzle overlap, atomization, line speed and fabric wetting become critical. The correct route should therefore be selected from fabric structure, required penetration, target dry chemical add-on, surface localization, drying capacity and widthwise uniformity—not from application-method preference alone.
Digital textile printing uses two very different viscosity systems: low-viscosity ink designed for stable jetting through microscopic printhead nozzles, and higher-structure fabric pretreatment designed to control wetting, penetration, migration and fixation on the textile. Conventional textile thickener should therefore not be added directly to a production ink simply because the printed fabric is bleeding or the ink appears too fluid. Doing so can change viscosity, surface tension, extensional behavior, filtration, droplet formation and printhead reliability. The normal solution is to control the fabric through pretreatment while keeping the ink inside the printhead manufacturer’s jetting window. Specialized polymer-containing or pretreatment-free inks are possible, but they must be engineered and validated as complete ink formulations for the specific printhead.
Contact angle on textile is an apparent, method-dependent indicator of the liquid–fabric pair. Compare timed drop spreading, defined disappearance or uptake measurements, add-on and moisture state, then validate image quality and durability through the actual ink system’s required fixation or curing and after-treatment. A lower angle or disappearing drop alone does not establish better printing or faster absorption.
Sticky pretreated fabric can reflect moisture, treatment add-on, formulation and storage interactions. Compare matched fabric and controlled drying, humidity and blocking conditions before changing the pretreatment.
Wet pick-up measures retained liquor. Calculate total-solids or component delivery on a stated mass basis, distinguish active polymer from nonvolatile content, and verify drying, residue and finished-print performance.
For direct disperse inkjet printing on polyester, evaluate viscosity, measured liquor pickup and drying as one controlled process. Declare the fabric reference-mass and product/polymer concentration bases before calculating add-on. Compare application uniformity, printed geometry and final color and fastness after the approved ink route; a formulation–pickup matrix alone does not isolate one mechanism.
Berikan nama produk, kegunaan, jumlah, tujuan pengiriman, serta TDS,
foto sampel, atau dokumen lain yang sudah Anda miliki. FSX Chemical akan meninjau
informasi tersebut dan merekomendasikan langkah selanjutnya terkait penawaran harga, pencocokan sampel,
atau pemilihan produk.
Informasi ProdukNama produk, grade, model, foto label, atau referensi pemasok.
Dokumen yang TersediaTDS, SDS, COA, foto sampel, daftar produk, atau data pengujian.
Rincian PesananPerkiraan jumlah, kemasan, negara tujuan, pelabuhan, atau syarat perdagangan.
Aplikasi atau KendalaProses pencetakan tekstil, kebutuhan formulasi, masalah terkini, atau target kinerja.